Creating an Operational Assessment
Operational Assessments let you run structured privacy assessments, such as DPIAs, LIAs and TIAs, across your organisation. This article walks through creating a new assessment using a DPIA as the ex…

Operational Assessments let you run structured privacy assessments, such as DPIAs, LIAs and TIAs, across your organisation. This article walks through creating a new assessment using a DPIA as the example. The steps are the same for every assessment type.
Tip: Incident Management, DSR Management and Framework Assessments follow a very similar creation process, so this guide is a useful reference for those modules too.
Use the workflow that suits your team
Privacy teams run assessments in different ways. Some link processing activities, third parties and risks before an assessment starts. Others prefer to identify them as the assessment progresses, or once it is complete. Both approaches are possible in the PrivacyCulture platform.
That is why only three things are required to create an assessment: a name, a business unit and a template. Everything else can be set now or added later. Choose the order that fits your privacy team’s operating model.
Before you start
It helps to know:
- which assessment type you need (for example DPIA or LIA)
- which business unit is responsible for the assessment
- which template you intend to use, including its version
Open the assessment type
- In the left-hand menu, select Operational Assessments.
- Choose the assessment type, for example DPIA. The types available depend on your instance and may include PSQ, DPIA, AIIA, LIA and TIA.
- The list page shows summary metrics and all existing assessments of that type. Select Create New.
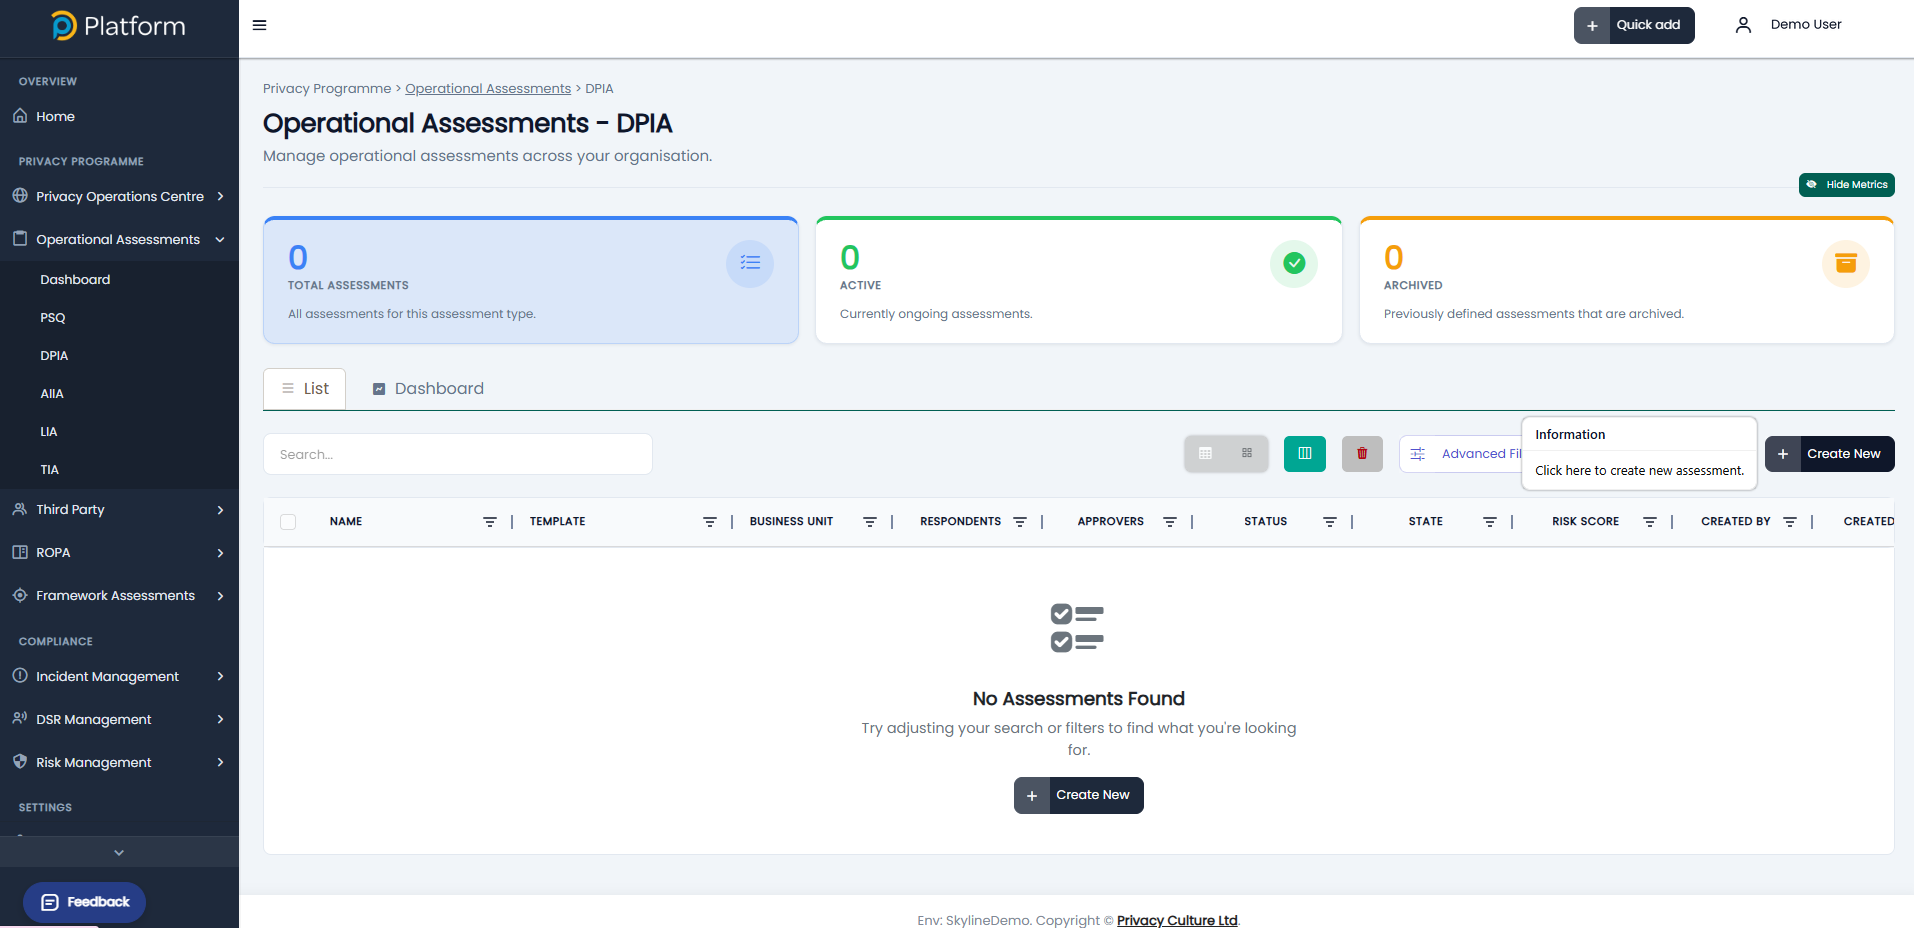
The Create wizard opens. It has four steps: Details, Inventories, Risks and Configure Template. Use Next and Previous to move between them.
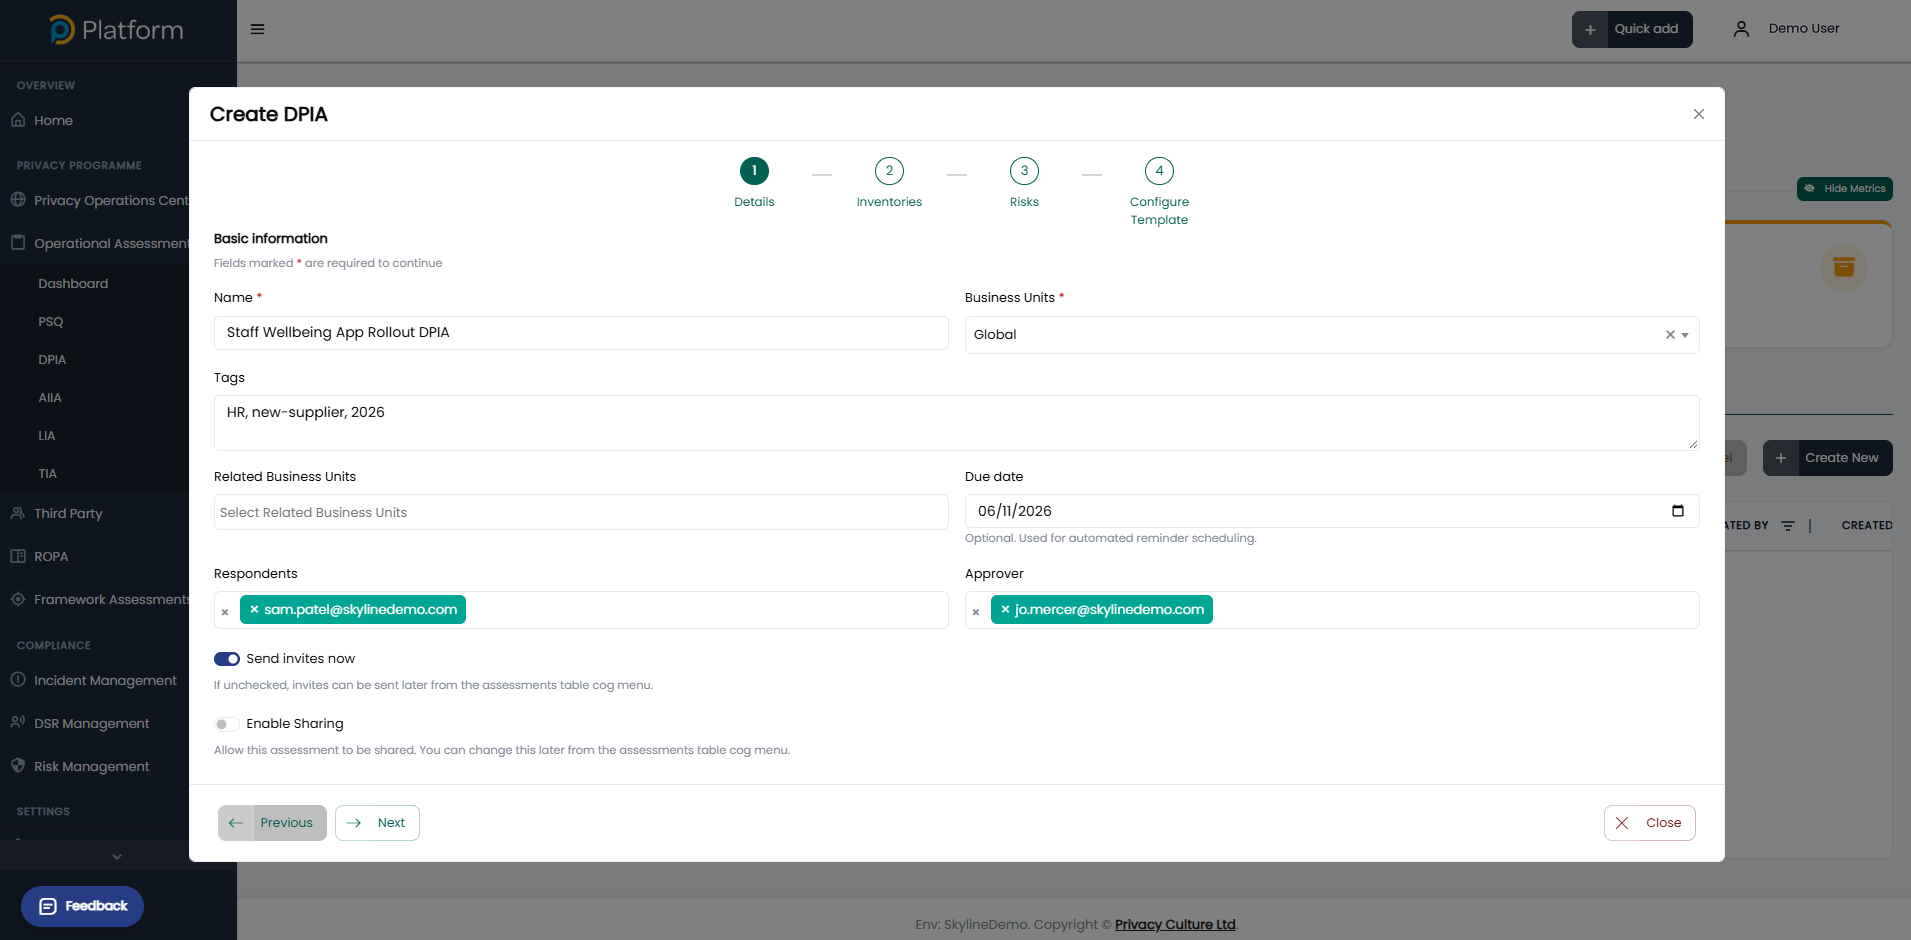
1. Details
Complete the basic information for the assessment. Fields marked with a red asterisk are required.
Field | Required | What it is for |
Name | Yes | A unique name for the assessment. Make it specific enough to find later, for example the project or system being assessed. |
Business Units | Yes | The business unit responsible for the assessment. |
Tags | No | Free-text labels for searching, filtering and grouping your assessments. |
Related Business Units | No | Any other business units involved. Useful for more complex assessments that span several areas. |
Due date | No | Leave blank if there is no deadline. If you set one, automated reminders are scheduled. |
Respondents | No | The people who will complete the assessment. |
Approver | No | The person who will approve the completed assessment. |
Send invites now | No | On by default. When on, respondents and approvers are invited as soon as the assessment is created. |
Enable Sharing | No | Off by default. When on, recipients can pass the assessment on to colleagues, inside or outside the platform. |
Tip: You do not have to assign respondents and approvers here. Many teams create the assessment first, check the content one last time, then assign people and send invites. If you only turn Send invites now on when you are confident in the content, structure and people involved, you avoid sending an assessment you later need to change. Invites and sharing can both be managed later from the cog menu on the assessment list.
2. Inventories (optional)
Link the assessment to the Third Parties and Processing Activities it relates to. Select one or more from each list, or leave them blank and link them later.
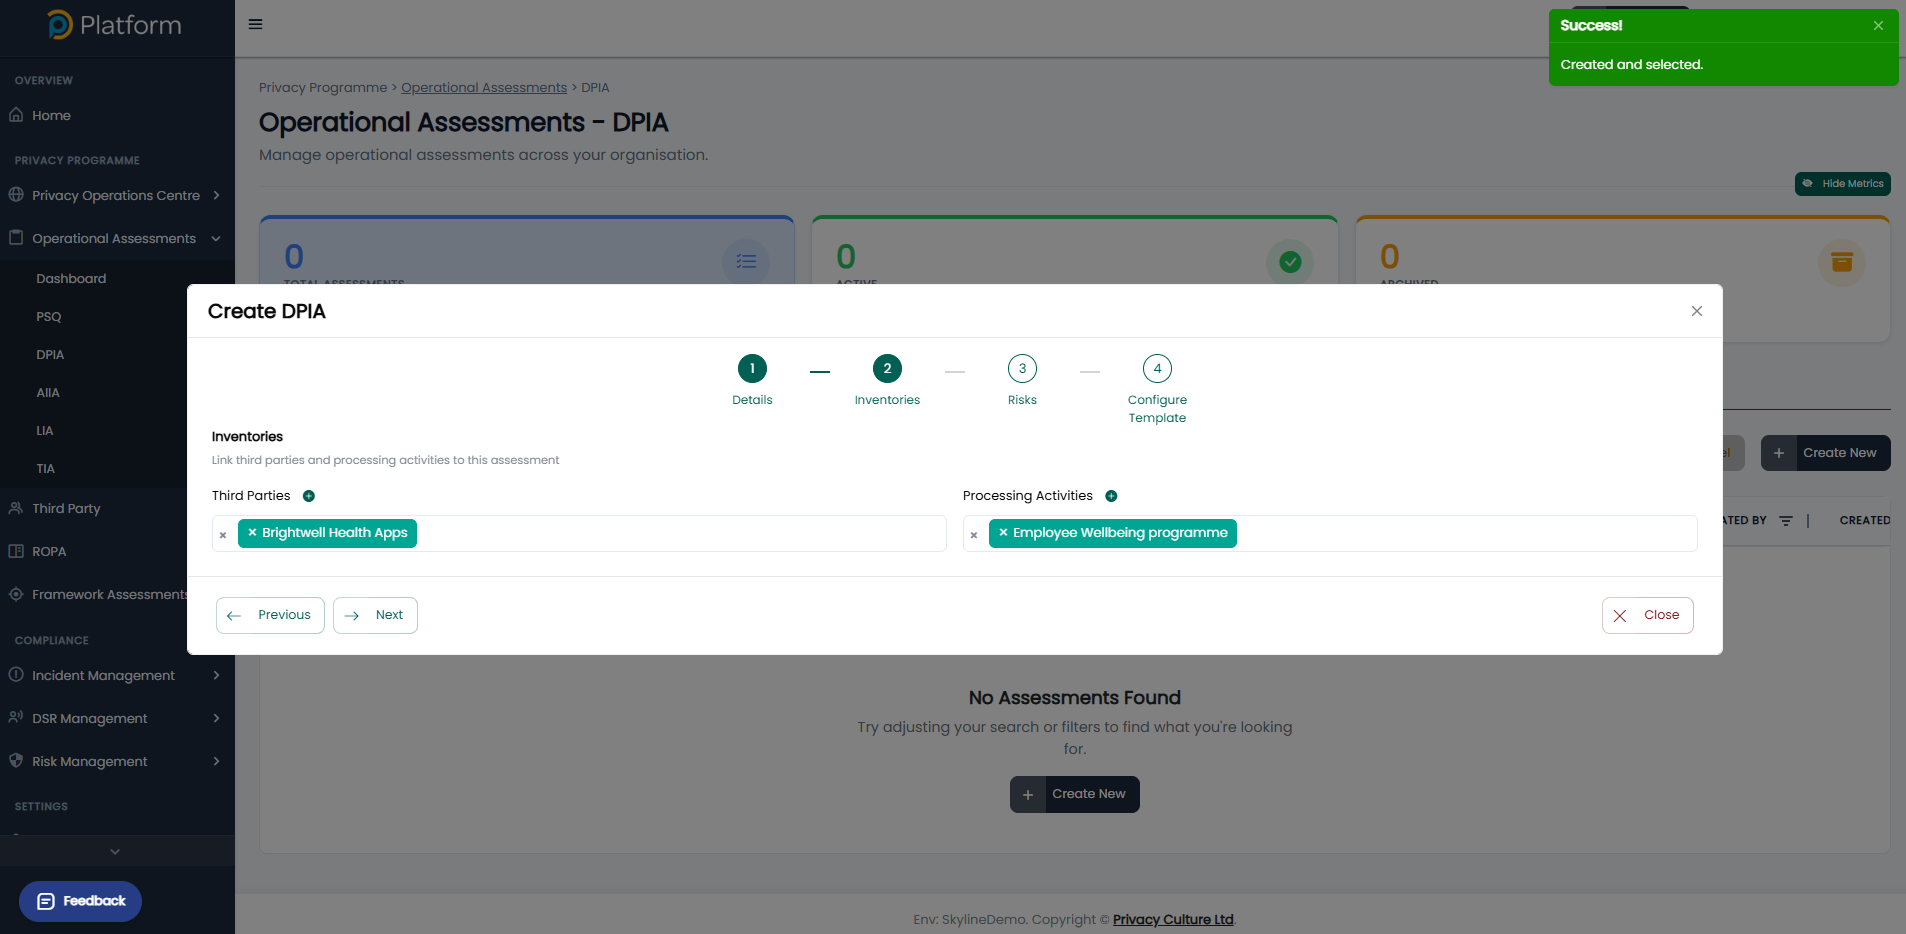
 If the third party or processing activity you need does not exist yet, select the + icon next to the field. This opens Quick Add, so you can create the record without leaving the wizard.
3. Risks (optional)
If the assessment relates to risks already recorded in your risk catalogue, link them here. You can also select + to add a new risk.
Equally, you can skip this step and identify and link risks during or after the assessment, depending on how your team works.
4. Configure Template
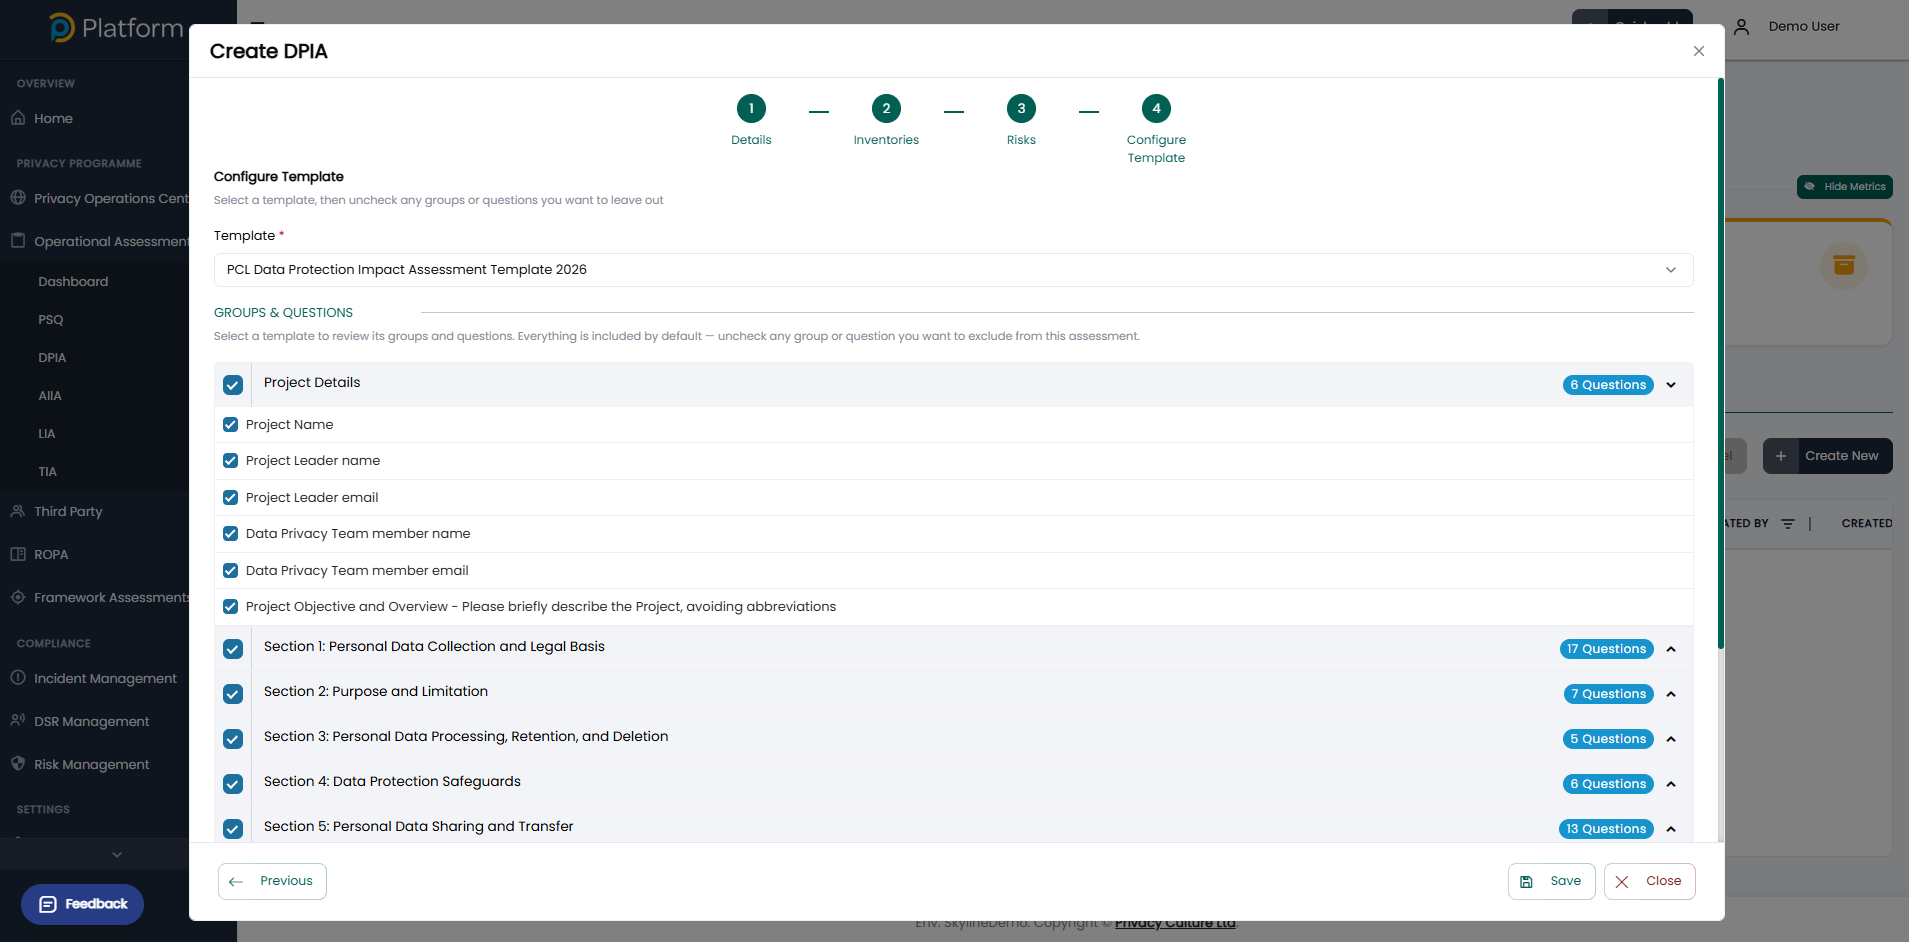
This is the most important step, because the template defines the questions your respondents will answer.
- Select a Template from the list. Only templates of the assessment type you chose are shown, so a DPIA will not offer LIA templates.
- Review the Groups & Questions. Every group and question is included by default. Select the arrow on the right of a group to see its questions.
- Untick any group or individual question you want to leave out. This is useful for producing a shorter assessment where some sections do not apply.
Check the template name and version. Templates can come from several sources: your own templates, Privacy Culture’s templates, or other libraries installed on your instance. Several may have similar names. Make sure you have selected the exact template and version you intended before you save.
Important: section visibility follows roles. Each template section can be set to show only to certain roles: Platform Admin, Privacy Team, BU Owner, Approver or Respondent. Ticking a section here includes it in the assessment, but it will still only be visible to the roles it is set for. If a respondent reports that they cannot see a section, check its role visibility in the template before treating it as a fault. For example, sections intended for the privacy team will not be shown to respondents.
To learn about building or changing templates, see the Template Manager and Template Authoring Service articles.
Save the assessment
Select Save. A Creating Assessment message confirms the assessment is being created in the background. If you turned off Send invites now, the message reminds you that invites can be sent later from the cog menu.
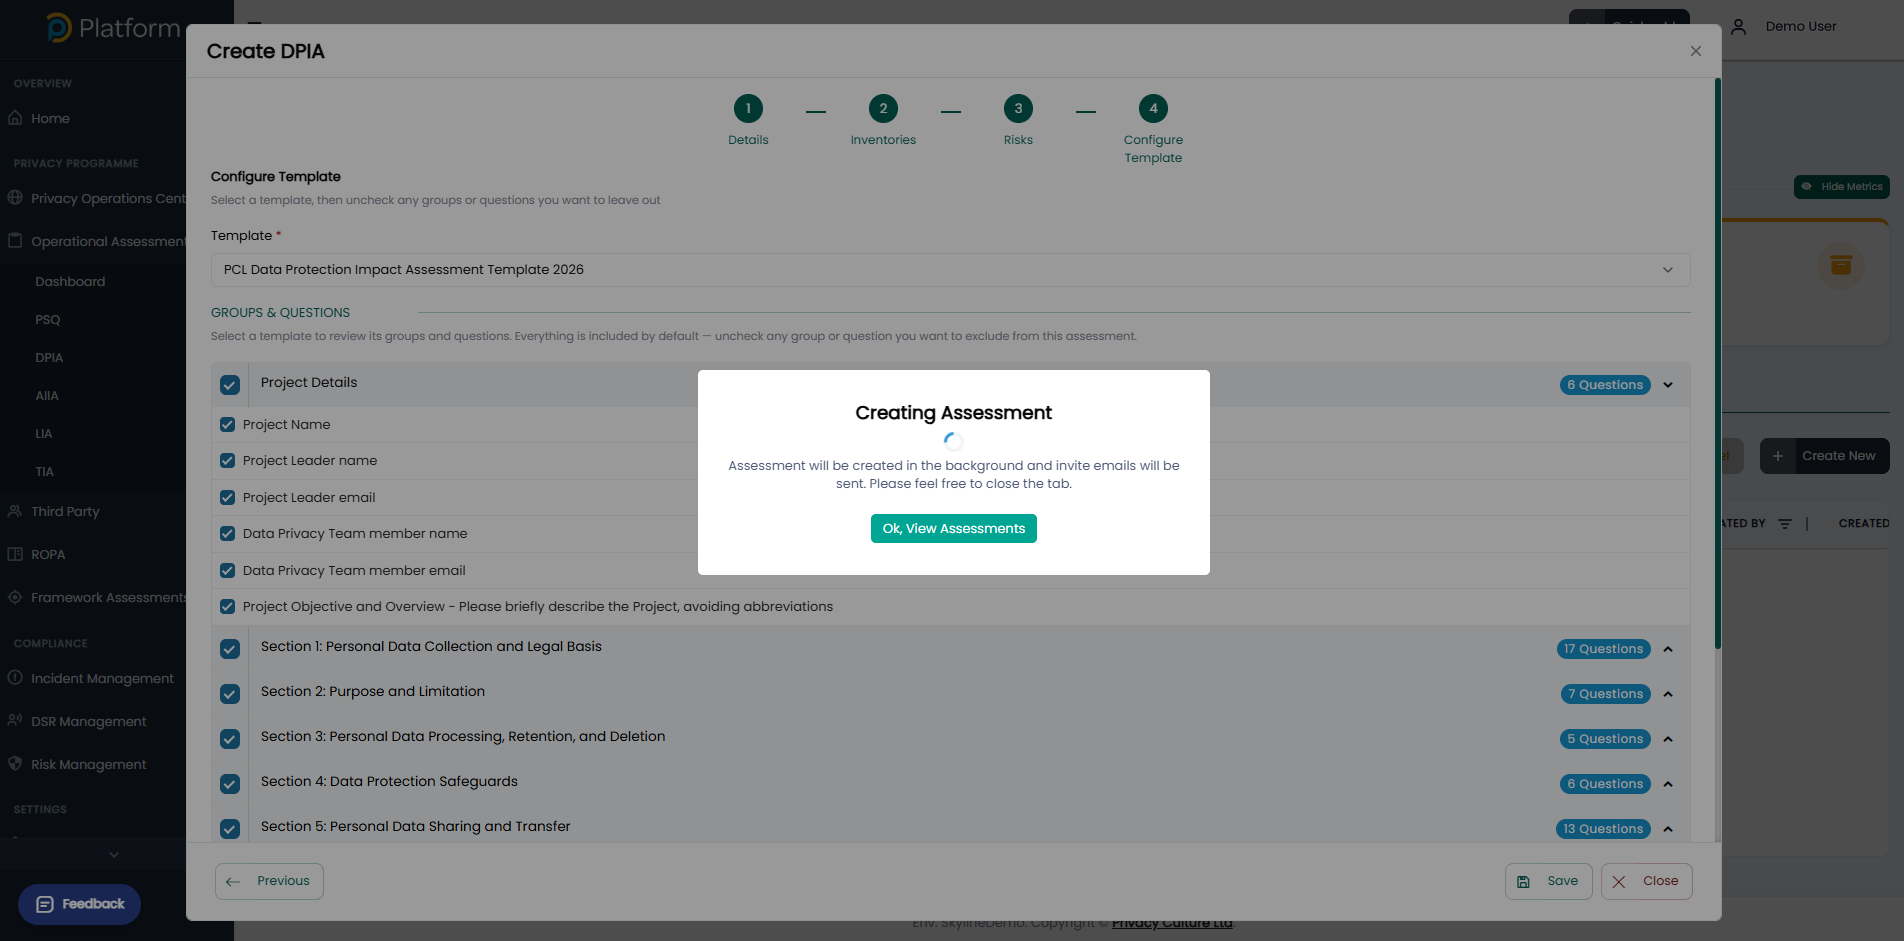
Select Ok, View Assessments to return to the list. Your new assessment appears in the grid with the status Not Started.
What next
From the cog menu on the assessment list you can:
- assign or change respondents and approvers
- send invites, if you did not send them during creation
- change sharing settings
Related articles
- Template Manager
- Template Authoring Service
- Sending assessment invites
- Linking risks to assessments
How did we do?

