Setting up Single Sign-On
Single Sign-On (SSO) lets your team log in using the credentials they already use for your company's identity system, removing the need for separate usernames and passwords. This article explains wha…

Single Sign-On (SSO) lets your team log in using the credentials they already use for your company's identity system, removing the need for separate usernames and passwords. This article explains what SSO is, where to configure it in the platform, and what you'll need to set up on your Identity Provider (IdP) side.
What is Single Sign-On (SSO)?
SSO is an authentication method that allows users to sign in once with a single set of credentials managed by your organisation's Identity Provider (such as Okta, Azure AD/Entra ID, Google Workspace, or OneLogin) and gain access to the platform without creating a separate password.
Instead of storing and verifying passwords directly, the platform relies on your Identity Provider to confirm a user's identity and then grants access based on that confirmation. This improves security, simplifies onboarding and off-boarding, and gives your IT team centralised control over access.
Where to find SSO in our platform
SSO settings are managed from your account's security settings area.
- Log in to the platform with an platform admin account.
- Navigate to Settings (by clicking on your username in the top right corner) > Single Sign-On.
- Select Add Identity Provider to begin configuration.
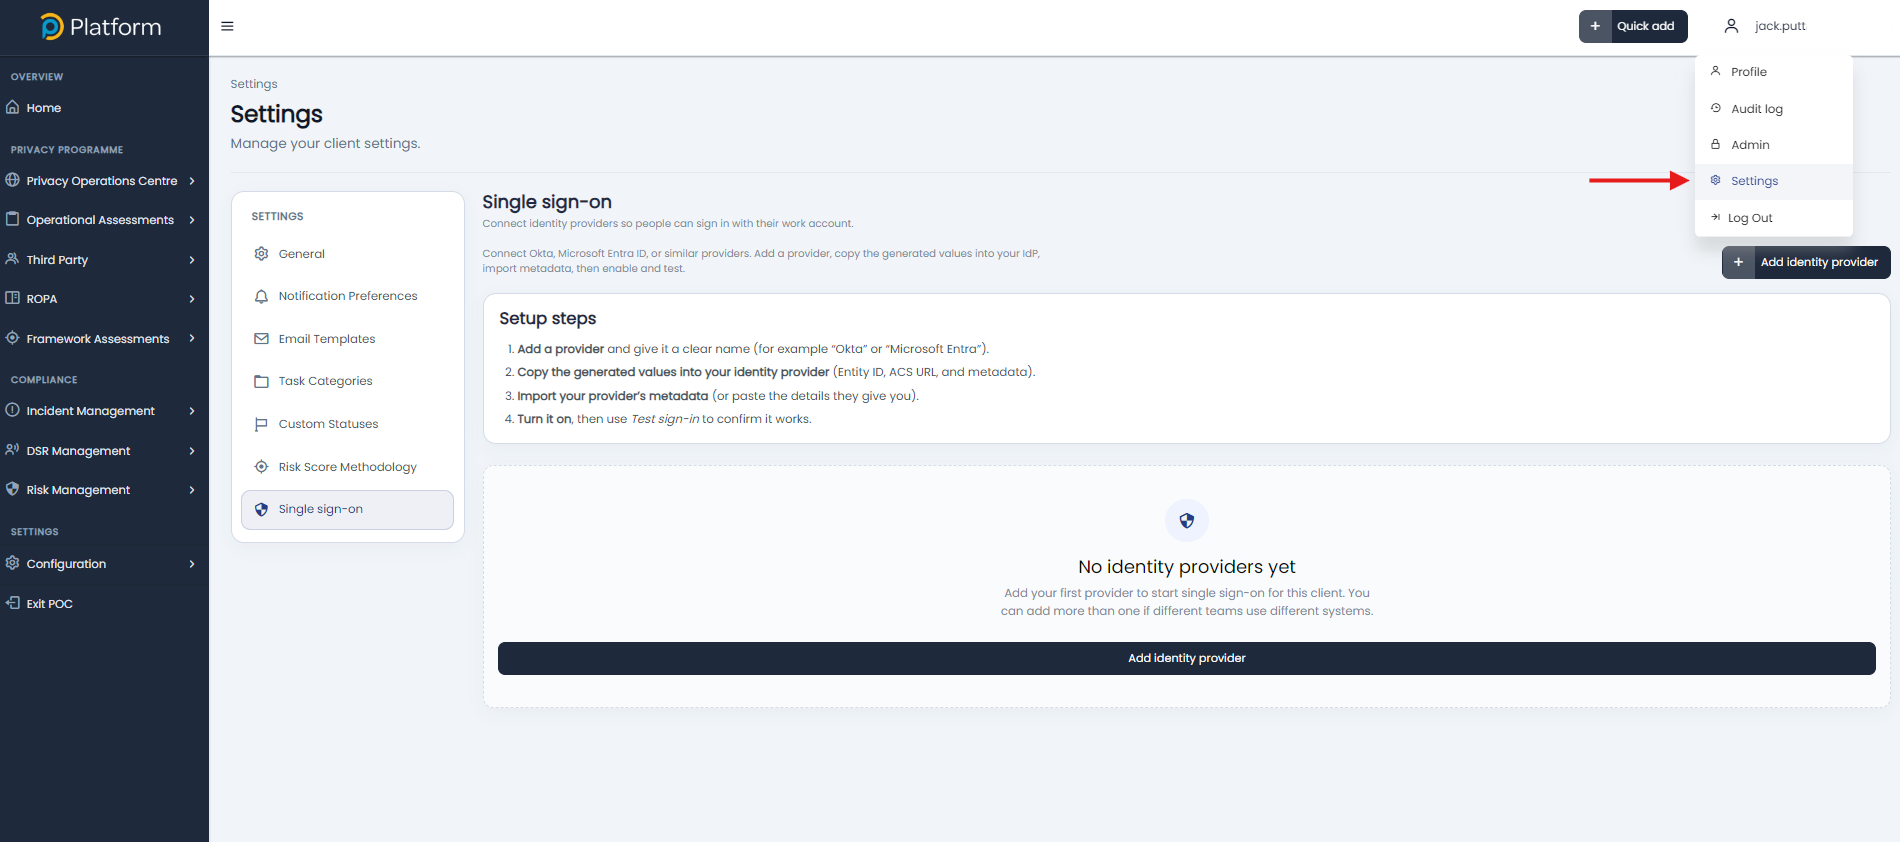
From this screen you can generate the details the platform needs to share with your Identity Provider, and enter the details your Identity Provider requires from you.
What you need to do in your Identity Provider
Setting up SSO is a two-way exchange of configuration details between the platform and your Identity Provider (IdP). The steps below outline the general process; exact field names may vary depending on which provider you use.
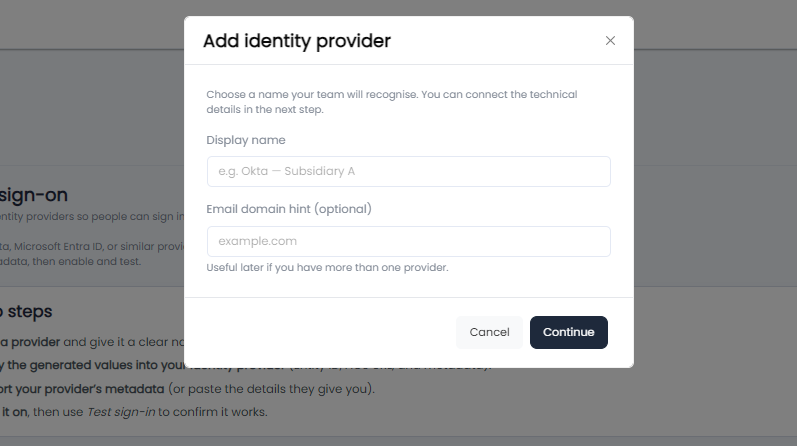
Give a display name for the connection - usually just the name of the IdP your organisation uses. You can optionally include the domain used to help differentiate if you have more than one IdP.
In your IdP admin console (request via your IT team if you do not have access), create a new SAML application. Choose SAML 2.0 if given the option, as this is the protocol our platform supports.
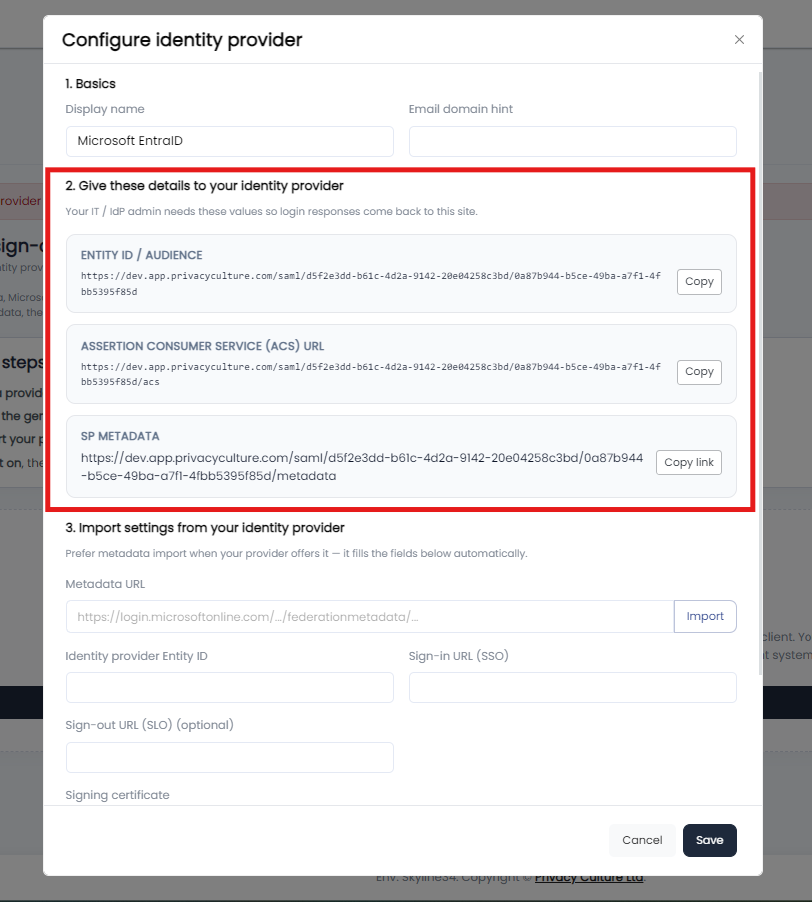
Copy the Assertion Consumer Service (ACS) URL, Entity ID, and Metadata URL (if required) from the platform's SSO settings page and paste them into the corresponding fields in your IdP's application configuration (or give to your IT team).
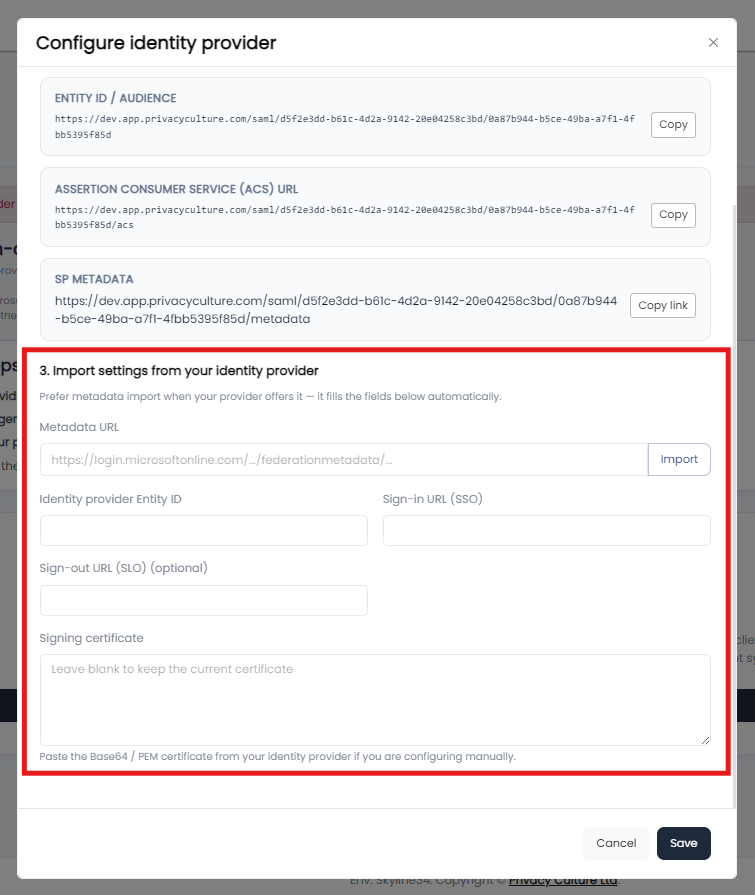
Return to the platform's SSO settings and paste in your IdP's Metadata URL (or upload the metadata XML file), IdP Entity ID, SSO URL, and signing certificate.
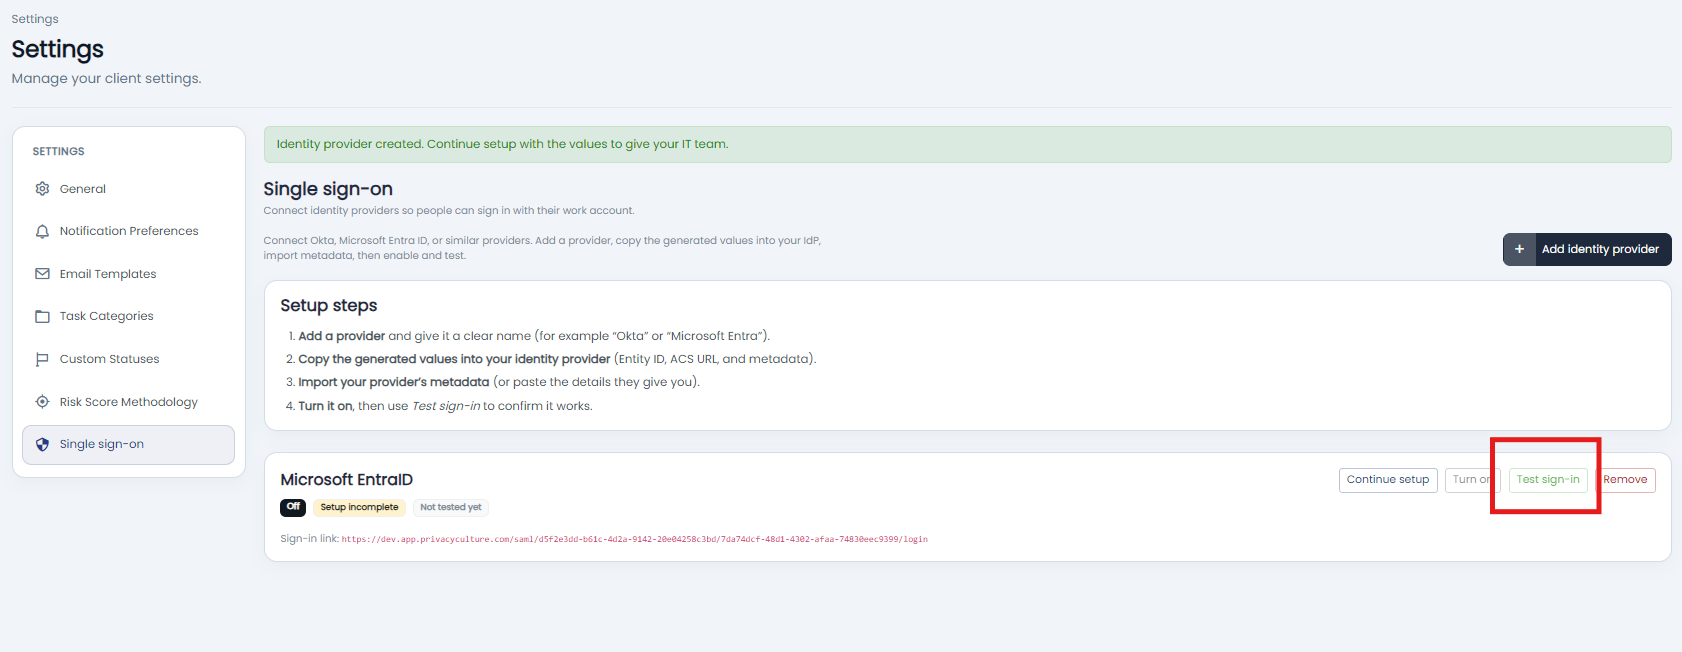
Assign a small group of test users to the application in your IdP, then use the platform's Test Connection button to confirm that login succeeds before rolling SSO out to your whole organization.
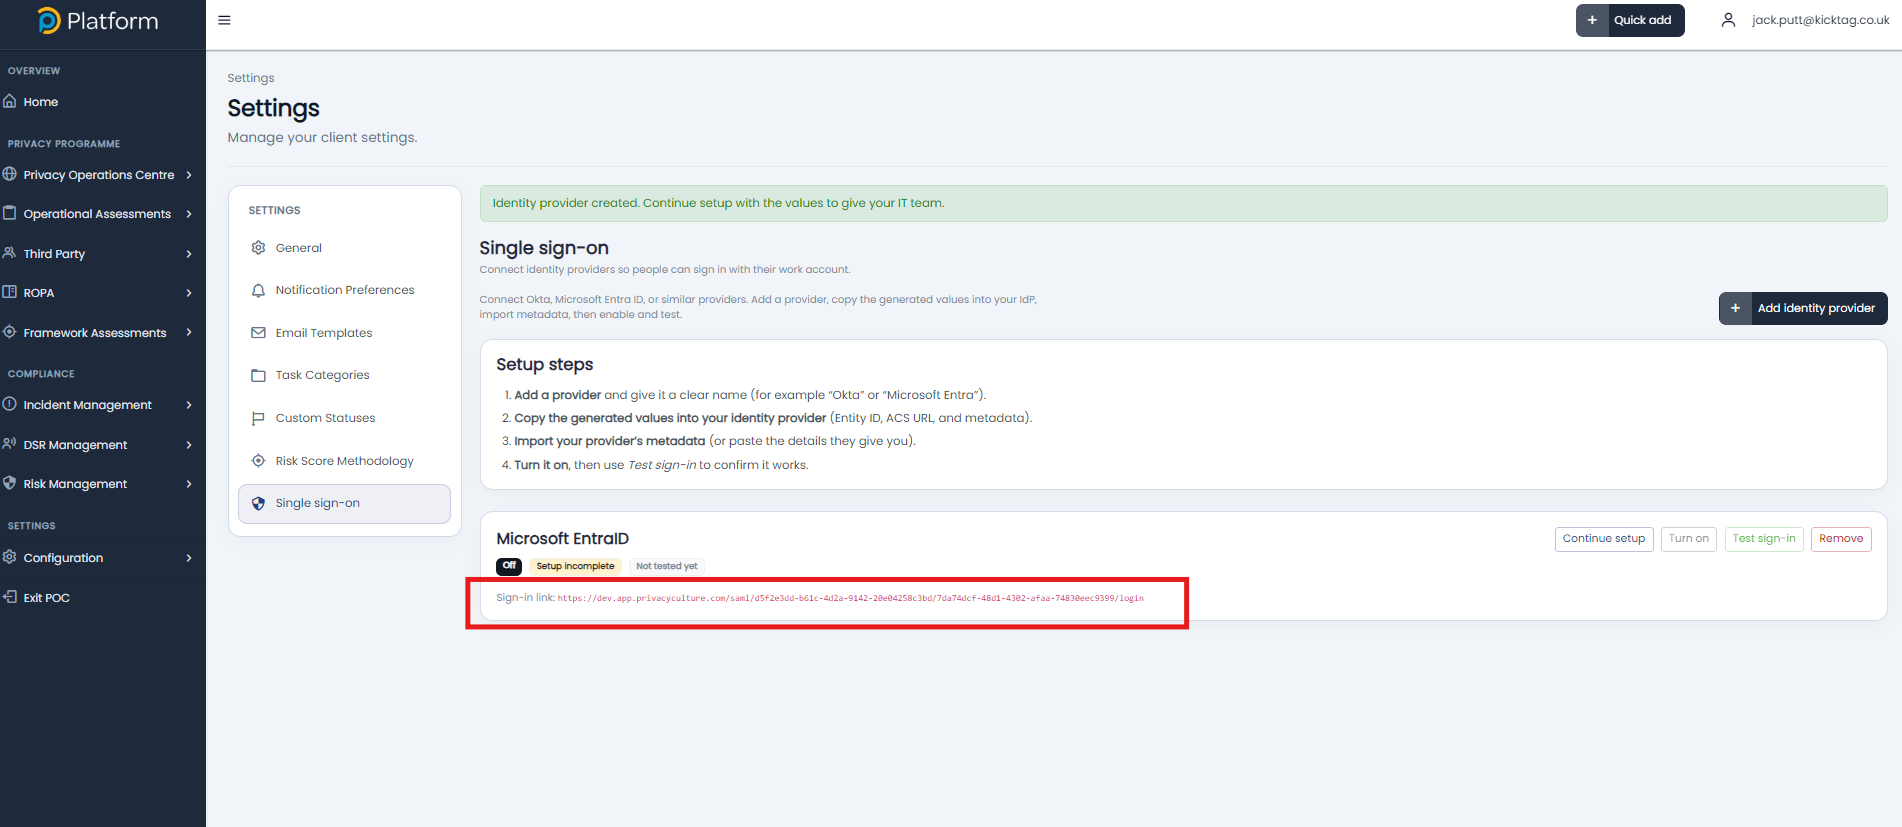
After proving a successful connection, you can distribute the Sign-in link internally and any user assigned to the group in your IdP will then be able to access. When a new user is added, they will be added with lowest privileged permissions - you can elevate and assign to a business unit from within the platform in either the Organisation and Users page within the Configuration menu.
Once testing is successful, you can enable SSO as the default or mandatory login method for your organisation from the same Settings > Single Sign-On page.
Next steps...
How did we do?
Granting a Single Sign-On User Access

