Granting a Single Sign-On User Access
Single Sign-On (SSO) lets your team log in using the credentials they already use for your company's identity system, removing the need for separate usernames and passwords. This article explains wha…

This article follows on from setting up Single Sign-On (SSO) for your account. Once SSO has been configured with your Identity Provider, you'll need to know what happens the first time a new user tries to sign in, and how to review and grant them access to the platform.
What happens when a new user signs in via SSO
When someone signs in using your organisation's Identity Provider for the first time, the platform checks whether a matching user account already exists. If it doesn't, the user isn't signed in automatically - instead, they're held on a holding page at /saml/pending-access until an admin grants them access.
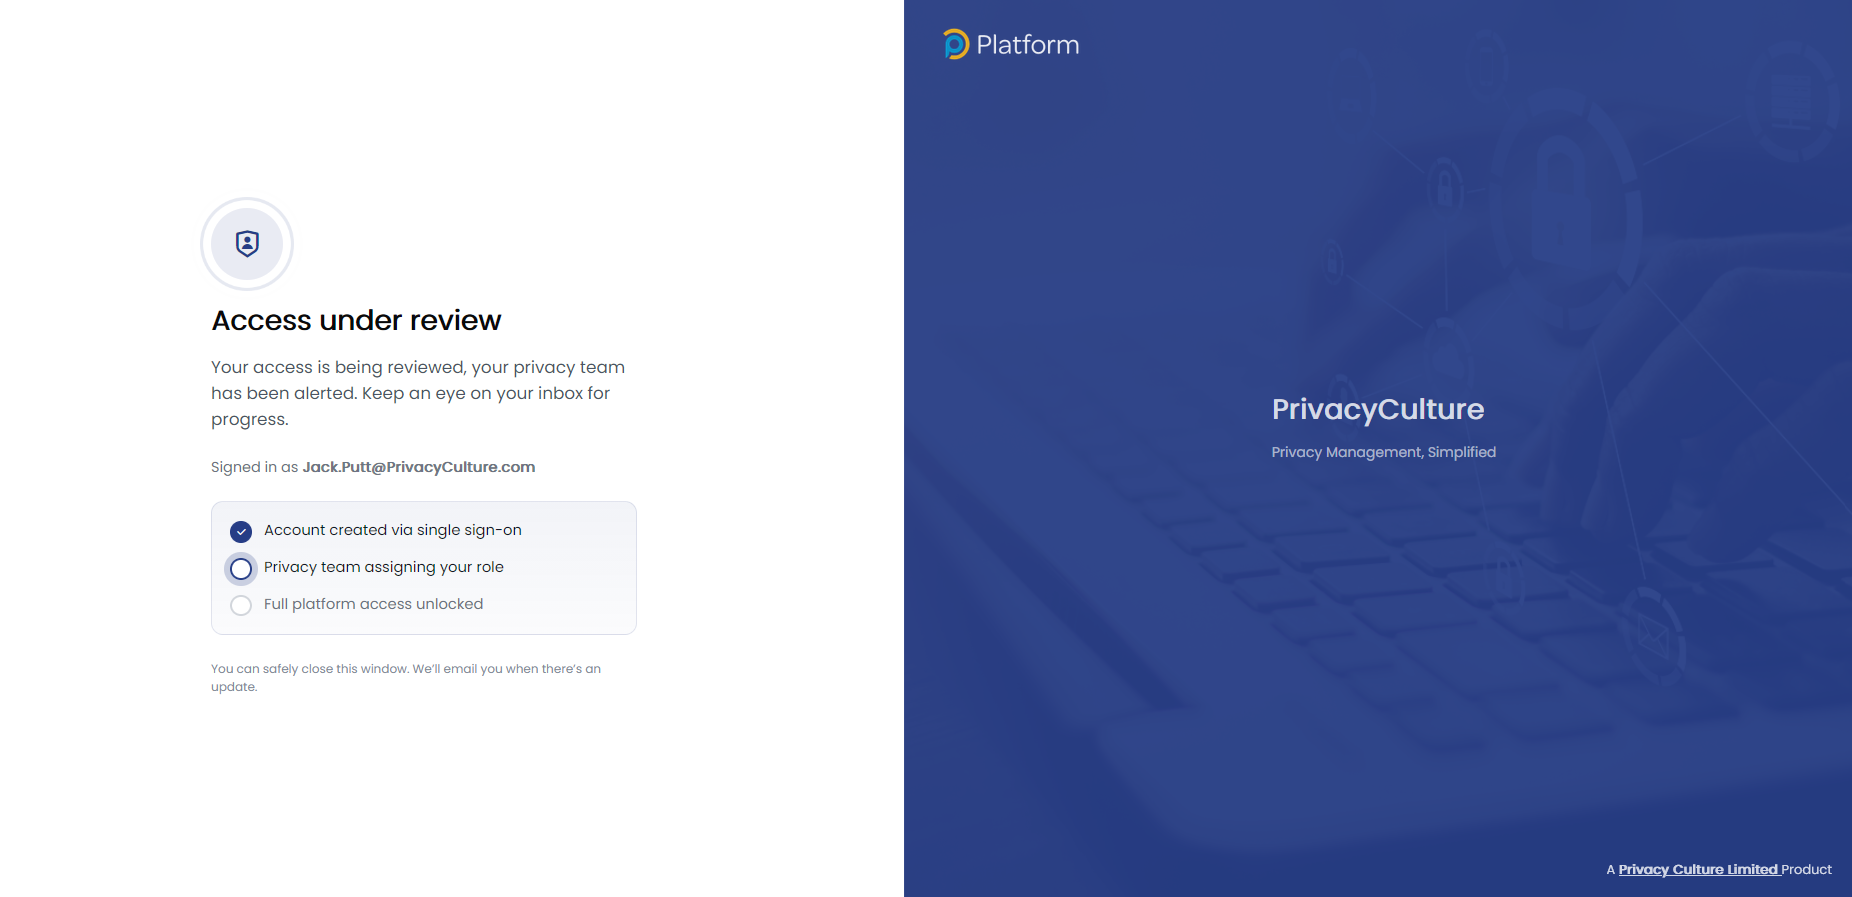
This ensures that simply having valid Identity Provider credentials isn't enough to gain access on its own - someone with the right permissions in the platform still needs to confirm the user should be added and decide what access they should have.
Reviewing and granting access
As soon as a user is held at the pending-access page, a Privacy Operations Ticket is automatically created to flag that access has been requested. This ticket contains workflow steps to guide you through granting the user access. The user requesting access will receive an email of the ticket that has been created, equally, any platform admins and privacy team members will also receive an email notification.
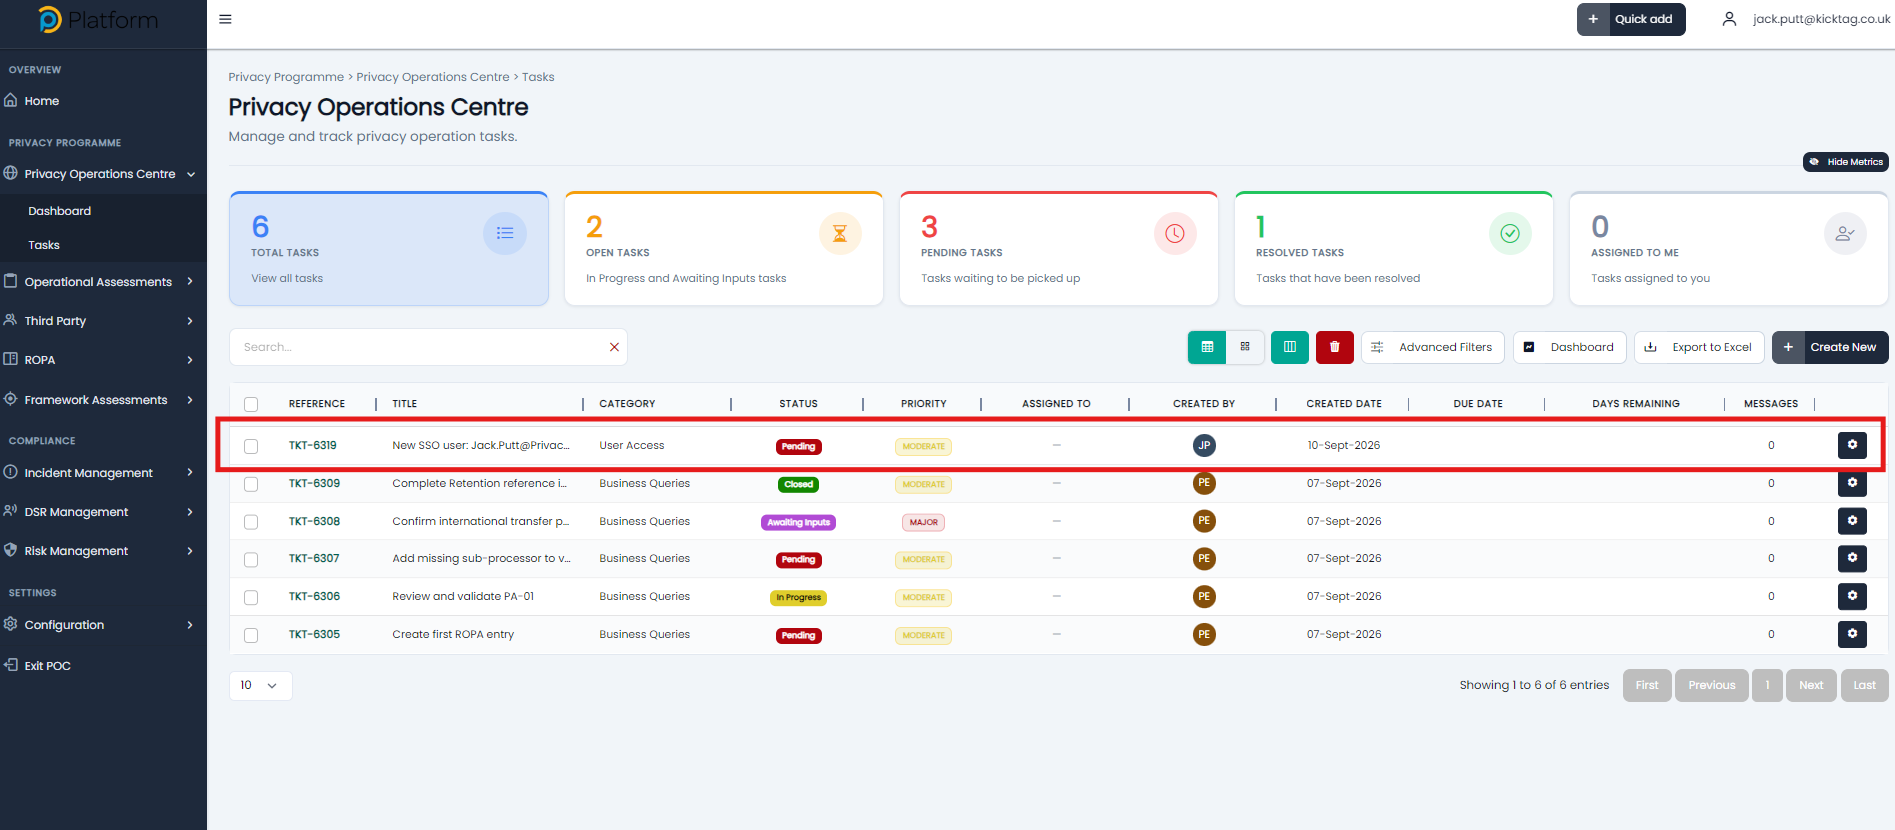
Check your ticket queue for a new ticket flagging the pending SSO access request. The ticket identifies the user's name and email address as provided by your Identity Provider.
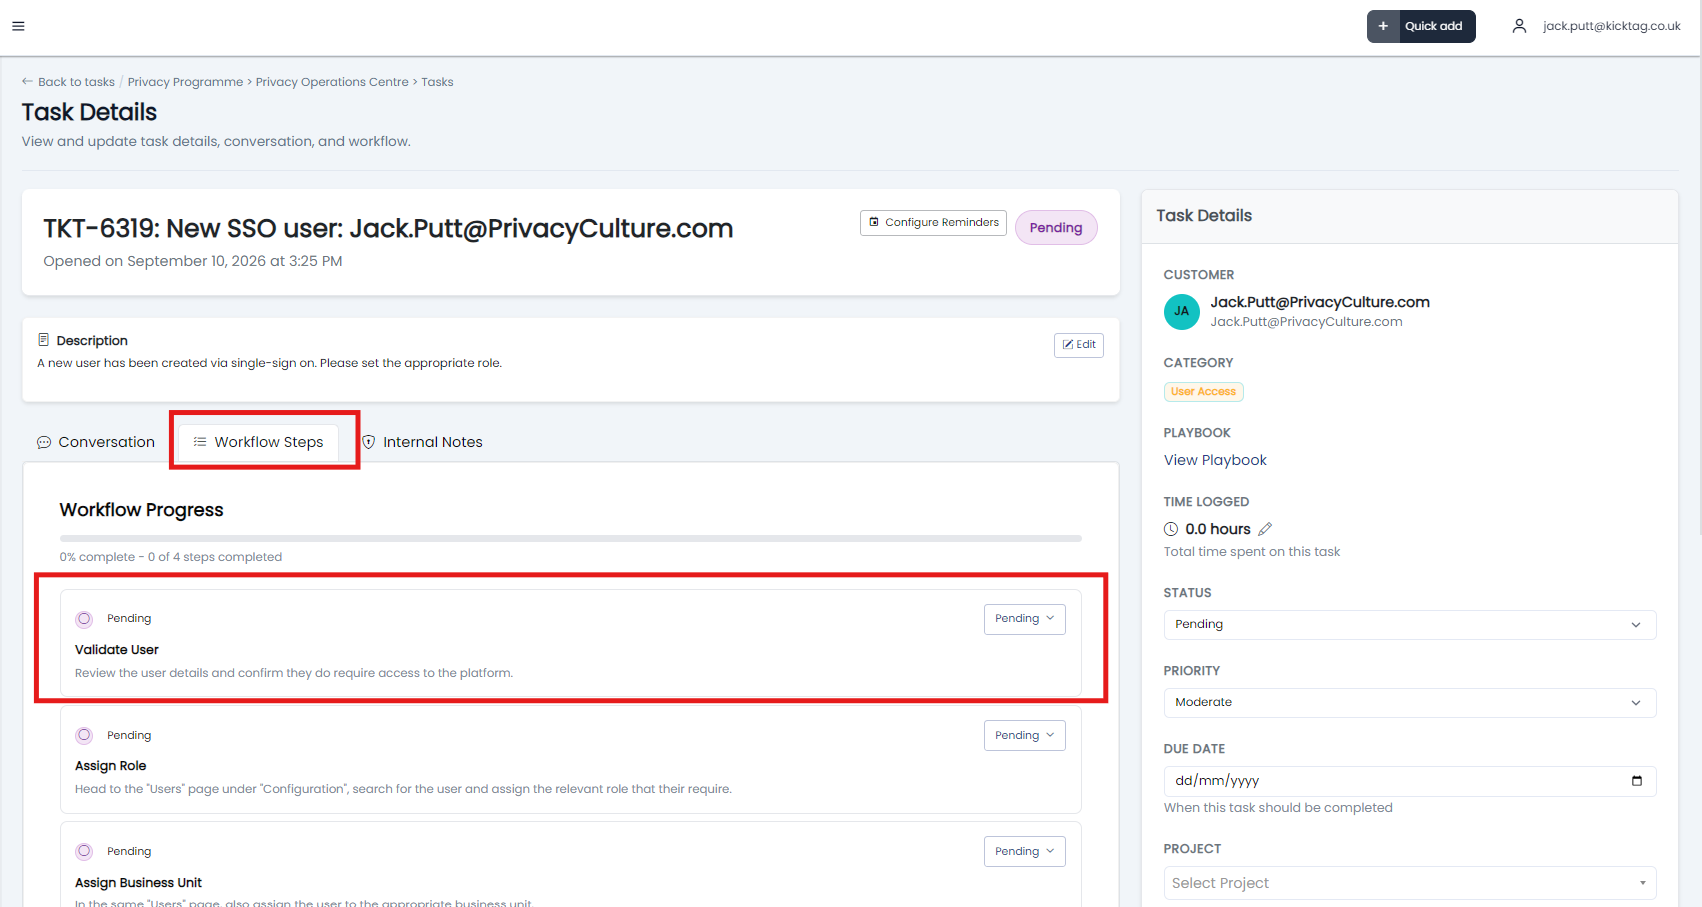
Verify that the requesting user is a legitimate member of your organisation before proceeding. The ticket workflow will not let you continue without assigning a role.
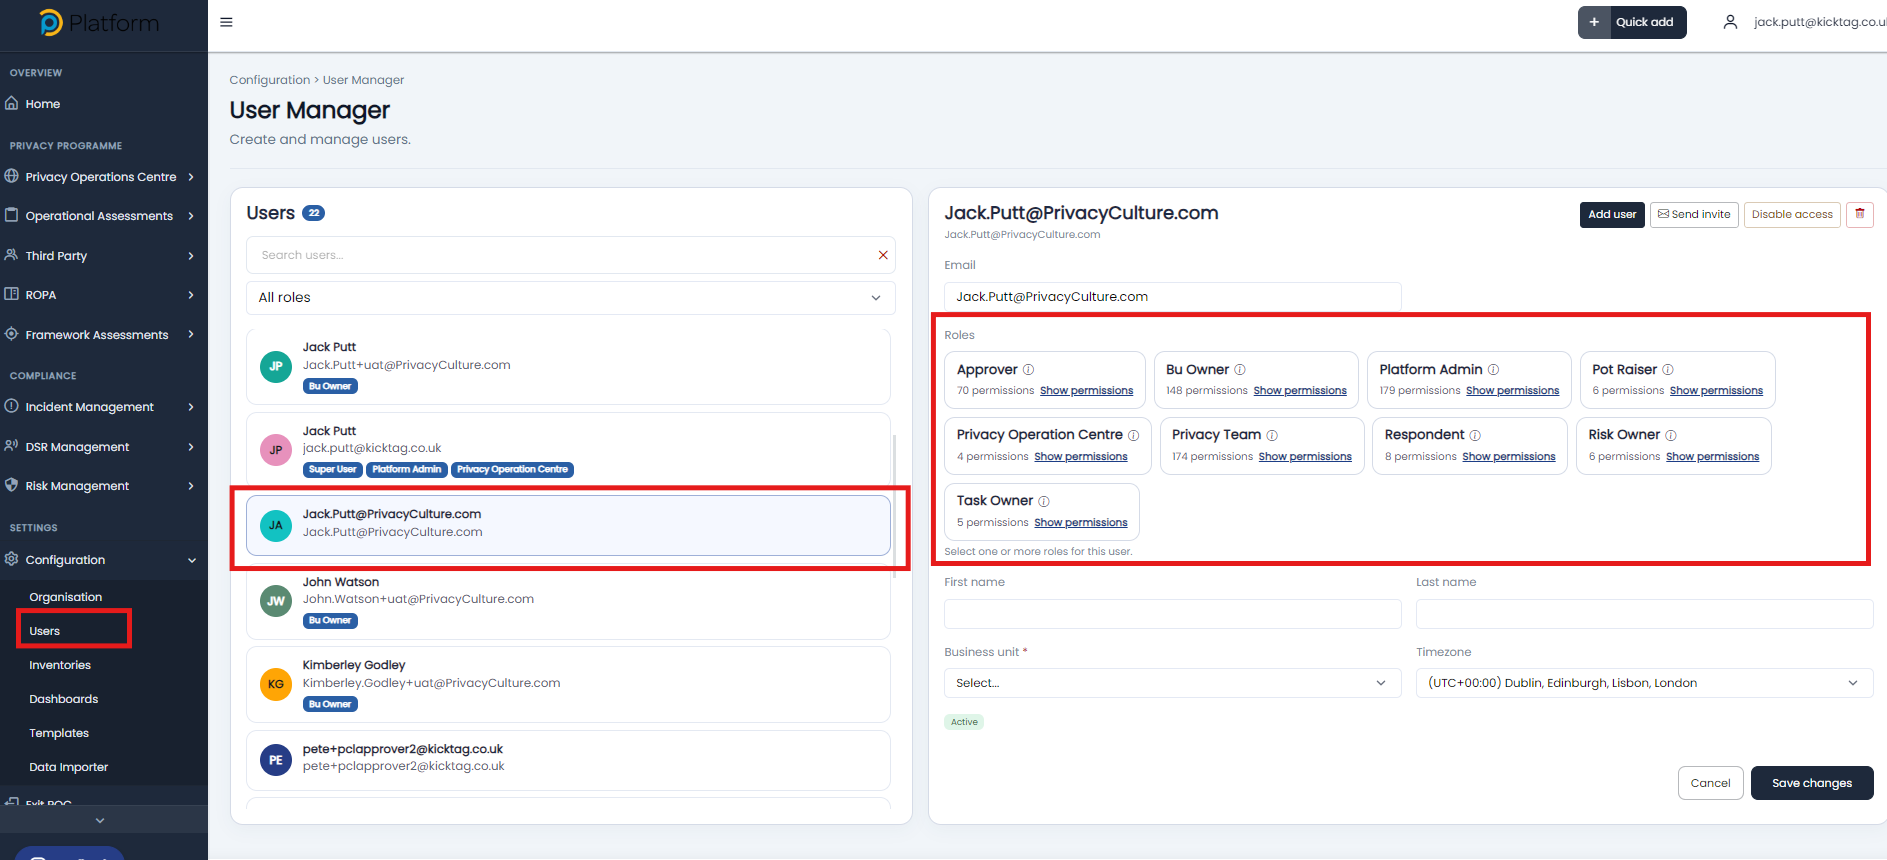
Follow the workflow step in the ticket to assign the user a role. This determines the level of access and permissions the user will have once logged in.
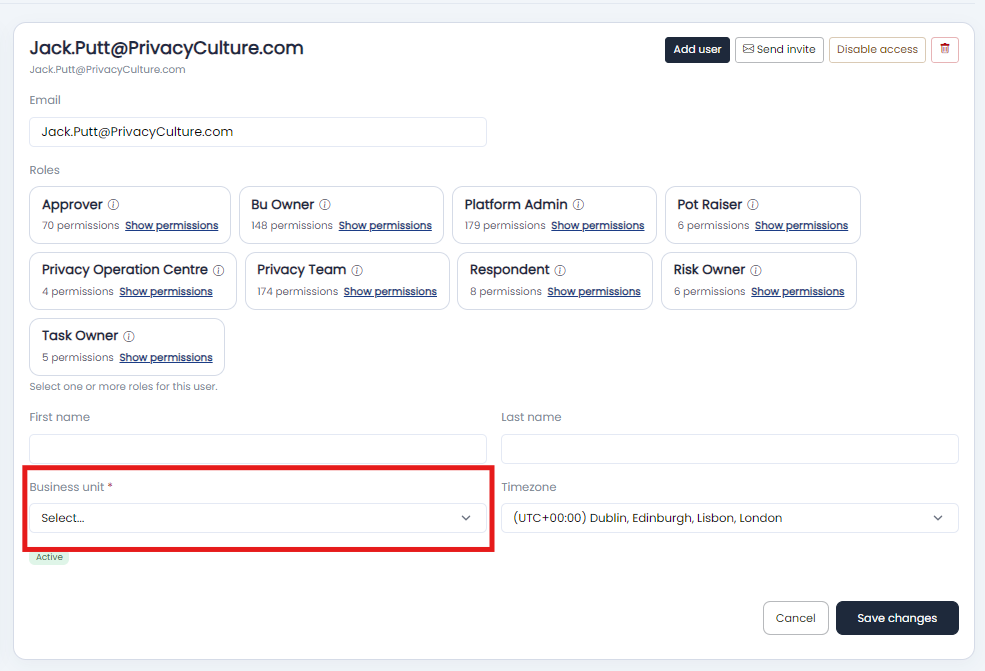
Follow the workflow step in the ticket to assign the user a business unit. This will determine what level of data the user will have access to.
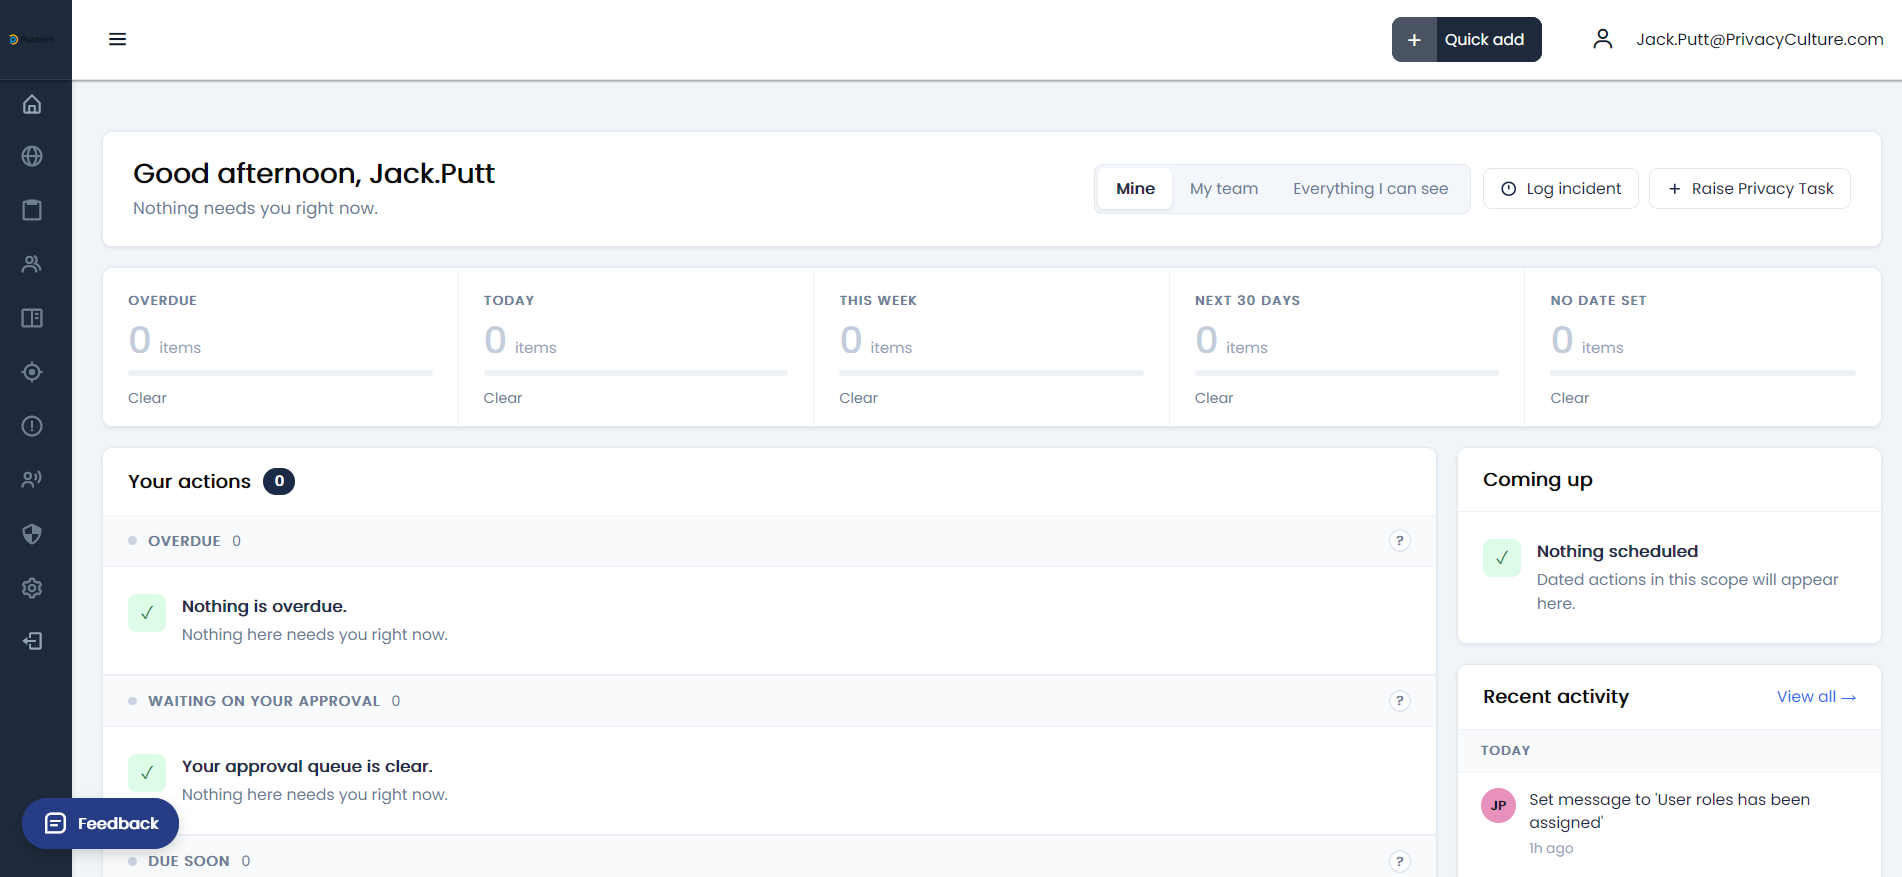
Once a role and business unit has been assigned, the user will then be able to access the platform. Head back to the ticket to mark it as resolved and then the user will receive a notification to say they have been granted access.
How did we do?
Setting up Single Sign-On

